Showing posts with label Entertaining Area Development. Show all posts

Sunday, April 08, 2007

Ok, Finally Some Pics

Here are some pics of the creation of the shade sail.

Shade Sail:
In case you don't recall how it looked previously here are some before pics:

View from the kitchen window

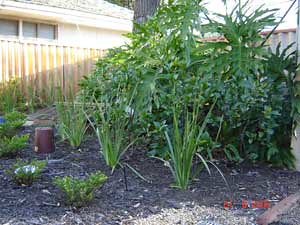
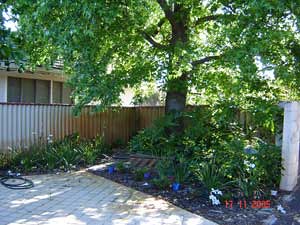
View as you come down the driveway


First the poles went in then were left to set for at least a week. The footings are about 1m square.


Then the sail came!


And finally, with it set up for entertaining:


I love the twist in the sail, so much more aesthetic on the eye than just a plane flat rectangle.

As with most things, I was a bit anxious as to how it would look at the end, but I'm very pleased with it.

BBQ anyone?

Sunday, November 19, 2006

Finally a New Post!

Sheeesh, I didn't realise I hadn't posted in here since March!

Later tonight I'll try upload some pics as there has been some activity over in the new entertaining area over the last couple of weeks.

Shade Structure
I have half a shade structure! Finally decided not to go with a Bali Hut as I thought it was too imposing, and 'hard' a structure, for the small area. So I've gone with shade sails. Many thanks are due to my mum for supplying the funds!!!

At this stage the posts have been installed. The actual sail should arrive in the next two weeks.

Tree Pruning
My beloved liquidamber has been pruned, rather severely. This was in preparation for the shade sail as well as being something I have considered having done for a while, but didn't have the funds to do.

They had to bring in a cherry picker to do the job; alas I wasn't here to see it and take pics.

Hope to post some pics later this evening!

Sunday, January 08, 2006

Update on Entertaining Area

Over --------------->> there in the sidebar is a section of links to posts about the development of my entertaining area.

The plants have been in for a year now, so I thought some updated pics were in order.

The paving has become stained due to the bore water. The path of white-ish stones has become stained from various things that drop from the tree - mostly it's the dead flowers from the tree that cause the staining; looks like I should have gone for a dark stone instead of light colour.

Cuphea in front of Dietes, Gardenia behind with Philodendron (ferns under Philo):

Cuphea-Dietes-Gardenia-and-

Dietes and Cordylines:

Dietes-and-Codylines-Dec-05

Up the path:

UpPath-Aug-05

Top area:

Top-of-Path-Dec-05

Fernery:
Fernery-Dec-05

Long Shot:
November 05-
17-Nov-05

December 05-
Longshot-Dec-05

Friday, January 21, 2005

Plants Settling In

The plants haven't done too badly. We had a 40 degree day on Monday.

The gardenias have all dropped leaves, which I expected as I hadn't been looking after them particularly well since the dingo day.

The azaleas seem quite happy.

Oh, I forgot something else I planted on Sunday - put in my clivia, one between the gardenias and the camelia, and the baby it had made near the tree trunk.

The dietes, phormiums and cordylines are doing well, haven't looked back. The camelia, clivias and hydrangeas also seem pretty happy where they are.

The ferns I transplanted to behind the tree haven't looked back either, not even one dead frond!

Have been very tempted to buy an el-cheapo bench seat from WA Salvage (think I saw them there for $50.00), but I really can't go spending money I don't have at the moment, so have been very strong and resisted the urge.

Other thing that stops me from buying an el cheapo bench is that it will continually get wet (from the sprinkler at the moment) and I'm sure it will disintegrate very quickly in those conditions. So it will look tatty and yuk in no time, so I'd rather not waste the money.

Maybe one day I'll be able to afford a nice teak one that can take the conditions.

Sunday, January 16, 2005

Phew! More Plants, Retic and the Seating Area

On Friday night the kids and Pas came over and thought I'd done well. Pas and I discussed the seating area a bit.

I decided to put the stones down anyway. It looks great! Put them around the jarrah rounds and up at the sitting area, and a little way into where I had moved the ferns to (behind the tree).

It looks so good, I'm glad I bit the bullet and did it. Didn't compact the ground at all - just layed the stones (about 3") over the top.

Then decided I really needed to get other plants still in pots into the ground so I planted:

  • More gardenias (between the bore pump and the driveway)

  • Fish bone ferns behind them - under the leaves of the monsteras)

  • More dietes in front of the gardenias


  • Phormiums (phormia?) and cordylines along the fence (towards the tap from the gardenias planted the other day)
  • Dietes in front of the phormiums and cordylines


I also put in some retic, as the sprinkler wont reach all the extra plants I put in.

Also mulched the newly planted areas.

Wow! This has made a big difference. It looks pretty good.

Haven't planted or mulched right to the edge of the paving for two reasons:

  • I don't have the plants yet (liriope muscari)
  • Think I need to redo the concrete at the edge of the paving as the dingo made it break and some pavers have moved.


I can now happily return to work tomorrow feeling that progress has been made. It's been over a year since the paving was done, and I was getting tired of looking at that dirty old Perth grey sand from the kitchen.

It looks *much* better now, even though still incomplete:


Saturday, January 15, 2005

Progress - Plants!

I bit the bullet after being so disheartened yesterday and decided to go ahead and put some plants in.

Partly because I will be back at work as of Monday, and the plants (in pots) aren't doing well where they are at the moment. I forget to water them every now and then, and that will only increase once I return to work.

Also because I didn't want the holidays to be gone and not much having happened over there.

I ripped out the edging I'd put in, and decided I'd leave that decision and what to do with the seat area later.


Then I raised the jarrah 'rounds' as I realised having them level with the ground is not a good idea no matter what the path is made of (mulch, stones whatever).


I planted:
  • Camelia - in the back corner
  • Azaleas - along from the camelia
  • Gardenias - along the fence
  • Azaleas - in front of the gardenias
  • Dietes - in front of the azaleas
  • Fish bone ferns - little baby ones, next to the tree trunk
  • Hydrangeas - same section as the fish bone ferns, near the tree trunk
Also decided that the reticulation can just go over the top of the ground. I can always submerse it later if I really need to. That meant I could also lay mulch where I'd put plants - which I did.


Am feeling very content with what I've done. I've feel I have had some productive time in the holidays (as well as enjoyed some very slothful time - see main blog).

It looked a whole lot better than it had done at the beginning of the day.

Thursday, January 13, 2005

Slow Progress

I feel as though I spent a long time out there yesterday, but the amount of progress belies that fact.

Grrr to tree stumps, grrrr to hidden underground remains of long gone and unknown fences.

I got about 3/4 of the edging in and managed to place the 4 jarrah stepping stones - though they're not placed as I'd really like them thanks to the above.

The section for the swing chair looks dreadful, even after the dingo day it looks way too uneven (on a slope) to work more on. Don't know whether to just go ahead and do it anyway or what :( arrgghhh. I don't want to do retaining, which is what I would have to do if I had the energy to level it by hand. I'll probably come across tree roots that would stop me from being able to do that anyway.

As a result of yesterday I'm feeling very disheartened about it. Not happy with the edging, not happy/unusable seat area. Can't put the plants in until that is sorted though, so I have to think of something.

Maybe use the old roof tiles for retaining? Across the front of the seat area, and not worry about edging it (though I've already put it in, but not happy with it).

Tuesday, January 11, 2005

Entertaining Area Progress Report

Dingo day has been and gone and proclaimed a sucess.

DingoNJD2
DingoNJD

The area is a lot flatter, including where the path and bench seat are to go. They are next on the hit list as I figure it is best to do hard structures first.

Today I layed out the hose in the approximation of what I want:


Purchased half a trailer load of quartz stone (white-ish colour), half a trailer load of cheap mulch. Unloading by myself was hard work. Was mamazed how well I backed the trailer up the drive. Also bought garden edging (for around the edge of the path)

Have decided to use the jarrah 'rounds' up under the clothesline as stepping 'stones' for the path.

Enquired about a hand compactor but they don't have them and the motorised ones are too big for what I need. The Hire guy suggested tying two bricks to a pole and using that. I have two pavers so I think I'll use them. Good Friend suggested water for compaction also.

Took some 'before' photos. After shovelling the quartz off the trailer today, and having done arm exercises with weights the night before I'm wondering whether I'll have sufficient energy to actually do anything tomorrow.

But I need to get this done, this is the last week of my leave and I would really like to get those plants int he ground before I go back to work.

Oh sugar, need to buy another small length of PVC pipe to lay under the path for the later-to-be-installed retic. Bugga. Hmm maybe since I'm not doing the road-base thing anymore I wont need to.

Wednesday, January 05, 2005

Tomorrow is the First Day

Tomorrow is Dingo Day.

I've hired a dingo so I can make the area more level, then I can finally start putting plants in the ground, think about doing the path myself and putting in some retic. I'm rather excited.

Moved the fish bone ferns today. Put them over behind the monsteras. I don't see any point putting camelias back there cos no one will ever see them, so I filled it up with the displaced fish bone ferns instead.

Where they were (they'd grown pretty well):


Where they were moved to:


Half way point:


Ferns all gone (to make way for shady seat area):


And finally - in their new home:


Having put the lawn clippings on/in the ground where the ferns were initially planted actually seems to have improved the soil .. this is one year later though!

Have an adult coming tomorrow to supervise, just in case there is a nasty accident with the Dingo, since I've never used one before.

Hope to also level the area where the pond/planter will go, and if I have time (it's booked for 4 hours) I'll also use it to dig the front porch garden bed, which I can't dig in thanks to too many tree roots.

A week ago Thunderbolt and I did the cementing around the paving - cos the paving guy never came back to do it. Considering neither of us had worked with cement/concrete before I think we did fairly well:


Saturday, November 13, 2004

:: Waldecks :: The people who know gardens best.

:: Waldecks :: The people who know gardens best.

The link is to the Garden Design page of Waldecks' web site. I have recently utilised this service; I picked up my garden plan today!

Having looked around a little this was the cheapest 'reputable' garden design fee I came across. With the plan in my hand I'm quite happy with the fee ($159.50).

I wanted a garden design person to have a look at the garden for two reasons. 1) I was floundering in trying to choose a theme for the new entertaining area (see my web site www.users.bigpond.net.au/degasperis), should I go for architectural theme (eg strappy leaves), tropical, low maintenance, perfumed garden, colour theme .. I just couldn't choose.

2) My efforts in the garden seem to have little effect on the overall 'look' of the rest of the garden; I had surmised this was due to the fact that there is no overall plan. I just have a collection (and a very eclectic one at that) of various plants, some of which I like and others I'm not very attached to.

I now have a plan! It is going to take a long long time to finish though - which is good since gardening is about the only thing that I do as far as leisure-time activities are concerned. It's also going to cost a lot of money .. there are about 300 plants on the plan - not all different thank goodness! Some I can 'make' myself, as I already have some from which I can propagate babies (dieties in particular).

There were two plants on the plan that I have decided to change entirely - one was lantana; I was so surprised to see this as I consider it a weed, and know it causes problems in our bush. The other was pencil pines ... uugghhhh!! Oh and there was a plumbago all alone by itself in a corner, don't think I will put that in either. Chose ajuga to replace the lantana, and will probably go with either more chillean willows (I already have 5) or more prunus, of which there were about 5 on the plan) to fill in the gap. She drew in features that I told her I have planned (the above ground pond at the entertaining area and the creek bed across the back), has included perfumed plants that I love (gardenias) and colours I mentioned whilst she was here (white and purple), as well as utilised plants I already have (a birds nest fern sitting in a pot waiting for a 'home', and the dietes).

There was one mistake however, I have tomatoes planted over at the entertaining area at the moment, just cos I wanted to plant some and that was a good spot ... she has left that entire garden bed (the one between the pond and the paving) as vegie patch!! hmm maybe I'll just plant what's on the other side of the paving there, that should look ok.

I haven't worked out yet what level maintenance garden this will be .. I'm thinking it will possibly be slightly lower maintenance that I would have preferred, however by the time I get it all in (which I expect might take several years) I might be thankful for that!

Overall I'm quite pleased with the end result. I have a plan to work towards, so when I go spend a few hours in the garden from now on it will be actually working towards achieving a particular look. The first area of attack will be the entertaining area.

I 'happened' to have a $50 Waldecks voucher in my bag, so of course couldn't come away with nothing, so I bought the 8 gardenias (4 professor Pucci's and 4 Lace Ladies) .. I've made a start!! Must take pics as I go so I can look back at the development.

Saturday, January 17, 2004

Planting of the Fernery

(click on the pics for a bigger picture)

Start with one large pot of Fish Bone fern - trick number one was to get the fern out of the pot without breaking it! Much straining of muscles and sweat later....

fernball

Remove ferns into separate plantlets - hmm that's a lot of fern!

bucketofferns

Plant ferns into ground and hope like hell they live! There's no reticulation where they are now planted, but this fern is very hardy and I doubt even I can kill it!

ferneryplanted

Hmmmmm, now what to plant back into the now-empty pot? Left over ferns of course!!

th_emptybluepot

The fernery about 3 weeks later. Some are growing, some don't look crash hot and some are dead. I think it will end up ok.

fernery080204


Update: The fernery got moved - details in this post.

Thursday, January 08, 2004

Installing the Soakwell

(click on the pics for a larger pic)

Start with one soak well kit:

asoakwell

Select a site:

soakwellsite

Objective: remove pile of lawn clippings, remove sand, install soak well:

bsand

Result - not much of a hole due to too many tree roots! Time to call a Jim.

failedsoakwell

Jim sucessfully installs the soak well:

soakwellin

soakwellin2

Now all that is required is some cement handywork at the drain

(Time passes ...)

Handywork on the drain done - not by yours truely though :(

soakwellgratelong

soakwellgrateclose