:: Waldecks :: The people who know gardens best.
The link is to the Garden Design page of Waldecks' web site. I have recently utilised this service; I picked up my garden plan today!
Having looked around a little this was the cheapest 'reputable' garden design fee I came across. With the plan in my hand I'm quite happy with the fee ($159.50).
I wanted a garden design person to have a look at the garden for two reasons. 1) I was floundering in trying to choose a theme for the new entertaining area (see my web site www.users.bigpond.net.au/degasperis), should I go for architectural theme (eg strappy leaves), tropical, low maintenance, perfumed garden, colour theme .. I just couldn't choose.
2) My efforts in the garden seem to have little effect on the overall 'look' of the rest of the garden; I had surmised this was due to the fact that there is no overall plan. I just have a collection (and a very eclectic one at that) of various plants, some of which I like and others I'm not very attached to.
I now have a plan! It is going to take a long long time to finish though - which is good since gardening is about the only thing that I do as far as leisure-time activities are concerned. It's also going to cost a lot of money .. there are about 300 plants on the plan - not all different thank goodness! Some I can 'make' myself, as I already have some from which I can propagate babies (dieties in particular).
There were two plants on the plan that I have decided to change entirely - one was lantana; I was so surprised to see this as I consider it a weed, and know it causes problems in our bush. The other was pencil pines ... uugghhhh!! Oh and there was a plumbago all alone by itself in a corner, don't think I will put that in either. Chose ajuga to replace the lantana, and will probably go with either more chillean willows (I already have 5) or more prunus, of which there were about 5 on the plan) to fill in the gap. She drew in features that I told her I have planned (the above ground pond at the entertaining area and the creek bed across the back), has included perfumed plants that I love (gardenias) and colours I mentioned whilst she was here (white and purple), as well as utilised plants I already have (a birds nest fern sitting in a pot waiting for a 'home', and the dietes).
There was one mistake however, I have tomatoes planted over at the entertaining area at the moment, just cos I wanted to plant some and that was a good spot ... she has left that entire garden bed (the one between the pond and the paving) as vegie patch!! hmm maybe I'll just plant what's on the other side of the paving there, that should look ok.
I haven't worked out yet what level maintenance garden this will be .. I'm thinking it will possibly be slightly lower maintenance that I would have preferred, however by the time I get it all in (which I expect might take several years) I might be thankful for that!
Overall I'm quite pleased with the end result. I have a plan to work towards, so when I go spend a few hours in the garden from now on it will be actually working towards achieving a particular look. The first area of attack will be the entertaining area.
I 'happened' to have a $50 Waldecks voucher in my bag, so of course couldn't come away with nothing, so I bought the 8 gardenias (4 professor Pucci's and 4 Lace Ladies) .. I've made a start!! Must take pics as I go so I can look back at the development.
Saturday, November 13, 2004
Tuesday, October 26, 2004
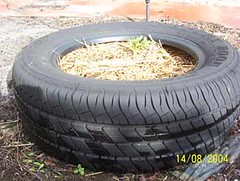
Growing Potatoes in Tyres
I'd read/heard about this lots of times and finally gave it a go.
You need:
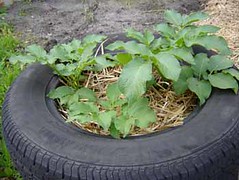
17 July 2004
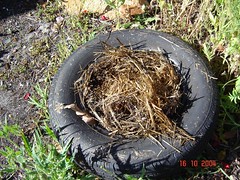
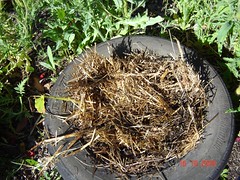
A third plant poked up its head a few weeks ago and is growing faster than the first two (pictured above). You can't tell from the pic below but there is a fourth one that has only just started to make its way through the straw. Been wondering whether to try putting more straw on, then read on a web site to wait until the plants are 30 - 40cm tall before doing so, so more waiting.
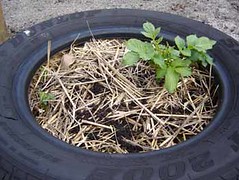
1 August 2004
Decided to put more straw and another tyre on. Gardening Australia on Friday night they put the straw on quite loosely, I've been fairly cramming it down. So put straw on more loosely and ensures a fair amount of the tops of the plants are above straw level. The fourth plant that poked its head through the straw didn't do anything, so I doubt now that I'll see that one again. So, loosely placed straw, and some more Dynamic Lifter for good measure - let's see how that goes.
14 August 2004
Tyre number one is progressing very well, the plants seem unchecked by the addition of the extra straw. The plant in tyre number two is also looking good. The light is a bit weird in the pics as it's early morning.
22 August 2004
Both tyres are progressing. They've grown quite a lot since I took these pics - only problem is I haven't any more tyres! Time for a trip to the tyre shop for some more freebies methinks!
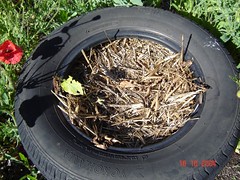
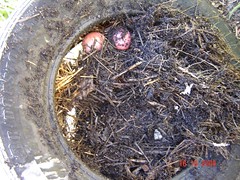
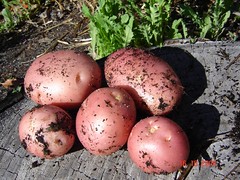
October 2004 - Harvest Time!
Wow that took a long time, methinks I planted them way too early, or late, or something!
For the effort I didn't get as many potatoes as I thought I would get, but get some potatoes I did:
Prologue
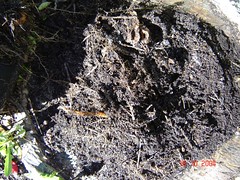
The ground where the tyre had been was very enriched and yummy, unlike the surrounding sand.
I didn't harvest one of the tyres and the potatoes it had grown also shooted (shot?) and grew, and then I harvested. They were smallish, but yummy none-the-less.
Nothing like home-grown produce; give it a go!
You need:
- About 10 sheets of newspaper
- 2-3 tyres
- Seed potatoes, or ones from the pantry
- Straw (about $5.00 for a bale)
- It started when I had to have a tyre on the car replaced - wondering whether they would give me some tyres for free, and they did! So head on down to your local tyre place if you don't have any laying around.
Instructions:- Place the newspaper on the ground, use quite a lot of sheets to stop the weeds coming through
- Position one tyre on the newspaper
- Put a small amount of compost in the bottom, add fertiliser if you like
- Place potato on compost
- Cover with straw to the top of the tyre
- As the potato grown up through the straw add another tyre and more straw
- When the plant flowers and then dies, kick over the tyre and reap what you have sown!
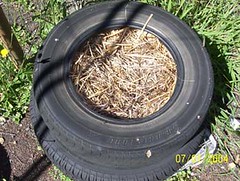
28 March 2004
My first attempt wasn't very sucessful, one plant poked its head up throught he straw so I piled on more straw never to see the plant again :(
I've started this again, this time using seed potatoes and layers of potting mix and straw. Let's see how this attempt turns out.
8 April 2004
5 weeks later and there's no movement at the station in the newest tyre. I put some Dynamic Lifter on the top (pelletised Chook Poo for those that don't know - smelly stuff!)
Sometime Early June
One plant poked its head up, and a few weeks later another, growing very slowly - I think because this tyre receives less sun than the first one I tried.
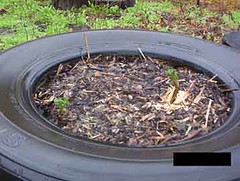
17 July 2004
A third plant poked up its head a few weeks ago and is growing faster than the first two (pictured above). You can't tell from the pic below but there is a fourth one that has only just started to make its way through the straw. Been wondering whether to try putting more straw on, then read on a web site to wait until the plants are 30 - 40cm tall before doing so, so more waiting.
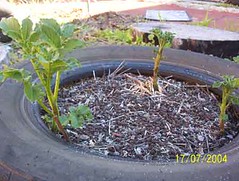
1 August 2004
Decided to put more straw and another tyre on. Gardening Australia on Friday night they put the straw on quite loosely, I've been fairly cramming it down. So put straw on more loosely and ensures a fair amount of the tops of the plants are above straw level. The fourth plant that poked its head through the straw didn't do anything, so I doubt now that I'll see that one again. So, loosely placed straw, and some more Dynamic Lifter for good measure - let's see how that goes.
14 August 2004
Tyre number one is progressing very well, the plants seem unchecked by the addition of the extra straw. The plant in tyre number two is also looking good. The light is a bit weird in the pics as it's early morning.
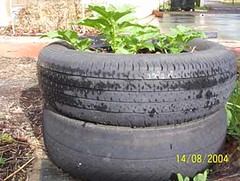
22 August 2004
Both tyres are progressing. They've grown quite a lot since I took these pics - only problem is I haven't any more tyres! Time for a trip to the tyre shop for some more freebies methinks!
October 2004 - Harvest Time!
Wow that took a long time, methinks I planted them way too early, or late, or something!
For the effort I didn't get as many potatoes as I thought I would get, but get some potatoes I did:
Prologue
The ground where the tyre had been was very enriched and yummy, unlike the surrounding sand.
I didn't harvest one of the tyres and the potatoes it had grown also shooted (shot?) and grew, and then I harvested. They were smallish, but yummy none-the-less.
Nothing like home-grown produce; give it a go!
Friday, October 01, 2004
Preparing
..for the long weekend, well kinda.
Lawn
Have put on raincheck a petrol mower, little electric one just can't cut it anymore
Roses
Bought two standard minature roses last night, one apricot one red. Hope to get them planted this weekend.
Avocado
Heaps of flowers coming
Mango
Also flowering
Tomatoes
Have my first actual tomatoes, some plants doing better than others, some in flower others not.
Pak Choi
The bugs seem to be leaving them alone now and growing well.
Sunday, September 26, 2004
First Entry
Have been thinking for a while of having a garden blog, like a garden diary to write down when I've done what, and projects I'm thinking of .. so now I have one.
Today - 26 September 2004
Gardenias
Repotted the gardenias that have been very sickly with damn mealy bug. Gave them a re-furbish type prune (ie very savage). Be interesting to see if they come back, doesn't matter really if they don't.
Rear Downchains
Thought of putting pots under the chains, but have decided to use a pile of rocks instead - the water will splash off them more gently into the lawn/garden. Also considering developing that further into a creek bed type thing, which will be damp during winter and dry during summer. Appropriate plants need to be considered - grassy types I guess.
Could also then grow the creek bed across the back to end in the kind-of defunct pond.
Big project, but can be done in small stages - the rock piles will be the starting point (once I manage to get some of the concrete slabs out of the way.
Lawn
Mowed the back lawn with the electric mower. Probably wont have a petrol mower before it needs mowing again. Verge needs doing but the electric wouldn't cope with it I don't think, so will leave it be and wait until I have a petrol one.
Hippies
Budding their heads off - have 9 buds, some will be open in the next few days methinks.
Tulips
Waste of time, only two plants reared their heads, made leaves only a couple of inches tall and have now died away. No doubt the bulbs are exhausted - think they will be bin material. Remember NOT to bother with these next year.
Runnunculas
Did/doing very well - plant these again.
Mango
Starting to blossom.
Today - 26 September 2004
Gardenias
Repotted the gardenias that have been very sickly with damn mealy bug. Gave them a re-furbish type prune (ie very savage). Be interesting to see if they come back, doesn't matter really if they don't.
Rear Downchains
Thought of putting pots under the chains, but have decided to use a pile of rocks instead - the water will splash off them more gently into the lawn/garden. Also considering developing that further into a creek bed type thing, which will be damp during winter and dry during summer. Appropriate plants need to be considered - grassy types I guess.
Could also then grow the creek bed across the back to end in the kind-of defunct pond.
Big project, but can be done in small stages - the rock piles will be the starting point (once I manage to get some of the concrete slabs out of the way.
Lawn
Mowed the back lawn with the electric mower. Probably wont have a petrol mower before it needs mowing again
Hippies
Budding their heads off - have 9 buds, some will be open in the next few days methinks.
Tulips
Waste of time, only two plants reared their heads, made leaves only a couple of inches tall and have now died away. No doubt the bulbs are exhausted - think they will be bin material. Remember NOT to bother with these next year.
Runnunculas
Did/doing very well - plant these again.
Mango
Starting to blossom.
Saturday, January 17, 2004
Planting of the Fernery
(click on the pics for a bigger picture)
Start with one large pot of Fish Bone fern - trick number one was to get the fern out of the pot without breaking it! Much straining of muscles and sweat later....
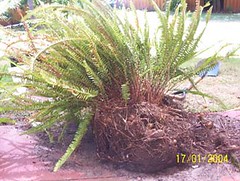
Remove ferns into separate plantlets - hmm that's a lot of fern!
Plant ferns into ground and hope like hell they live! There's no reticulation where they are now planted, but this fern is very hardy and I doubt even I can kill it!
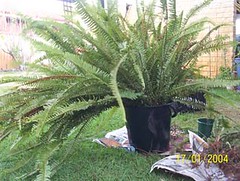
Hmmmmm, now what to plant back into the now-empty pot? Left over ferns of course!!

Start with one large pot of Fish Bone fern - trick number one was to get the fern out of the pot without breaking it! Much straining of muscles and sweat later....
Remove ferns into separate plantlets - hmm that's a lot of fern!
Plant ferns into ground and hope like hell they live! There's no reticulation where they are now planted, but this fern is very hardy and I doubt even I can kill it!
Hmmmmm, now what to plant back into the now-empty pot? Left over ferns of course!!
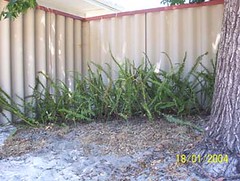
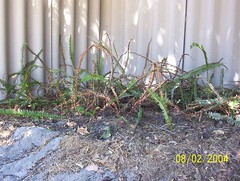
The fernery about 3 weeks later. Some are growing, some don't look crash hot and some are dead. I think it will end up ok.
Update: The fernery got moved - details in this post.
Thursday, January 08, 2004
Installing the Soakwell
(click on the pics for a larger pic)
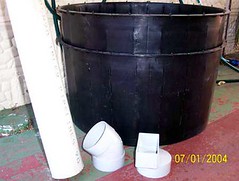
Start with one soak well kit:
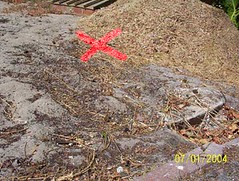
Select a site:

Objective: remove pile of lawn clippings, remove sand, install soak well:
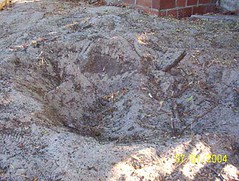
Result - not much of a hole due to too many tree roots! Time to call a Jim.
Jim sucessfully installs the soak well:
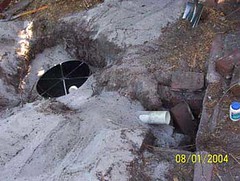
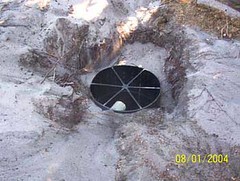
Now all that is required is some cement handywork at the drain
(Time passes ...)
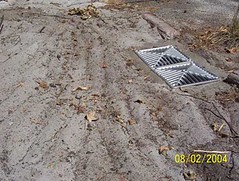
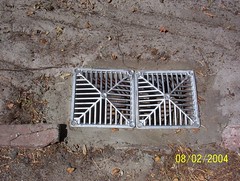
Handywork on the drain done - not by yours truely though :(
Start with one soak well kit:
Select a site:
Objective: remove pile of lawn clippings, remove sand, install soak well:
Result - not much of a hole due to too many tree roots! Time to call a Jim.
Jim sucessfully installs the soak well:
Now all that is required is some cement handywork at the drain
(Time passes ...)
Handywork on the drain done - not by yours truely though :(
Wednesday, January 07, 2004
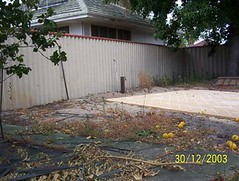
The Entertaining Area
Outdoor 'Beautification' Project.
(Click on any of the pics to get a bigger picture)
(Click on any of the pics to get a bigger picture)
It was a long time 'dream'/goal to change the ugliest part of my garden into an outdoor entertaining area. Whilst the 'grand plan' that used to exist has been trimmed down considerably (due to changes in my life) I have made a small beginning.
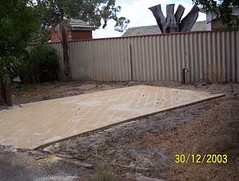
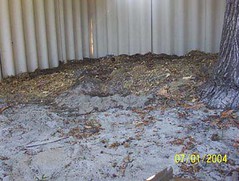
This has been a plot of typical Perth grey sand for quite a while, other than sometime-use as a vegetable garden. Poppies come up self-seeded here, as do some freesias.
Long term plan is to eventually have some kind of permanent shade structure - maybe a bali hut, for the interim I have a tent-type gazebo if extra shade is required. The paved area received shade from the lemon tree in the morning and from the liquidamber in the afternoon.
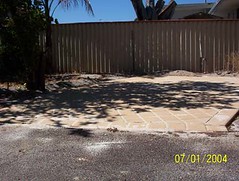
Current plan is to place an above ground pond, built from limestone blocks and pond liner, in the far left corner - running parallel to the paving. Gardenia between the bore pump and fence (right hand side of the pic above), ferns under the large tree (it's a liquid amber - right hand side of pic). Perhaps a privacy screen across the top of the fence. Retic running from the tap (which is attached to the bore). Rest of the plants are as yet undecided - maybe kangaroo paw, lavendar, rosemary; all I know at this point is I want it to be low maintenance.
Commenced the groundword for the fernery:
Click here for Part Two - Planting The Fernery
Click here for Part Three - The Fernery Relocates and Paving Cemented In.
Subscribe to:
Posts (Atom)